Tuesday, March 31, 2015
Lorac's Liner
Today's post is going to be quick. I just wanted to give a real life example of the Lorac liquid liner pen I talked about in my previous post so that you can all see how amazing it is. So here is my eyeball for proof! The liner for this look only took about a minute, give or take a few seconds.


Friday, March 27, 2015
Liquid Liner Pen
Hello All! Today I'm here to talk to you about liquid eyeliner, everyone's favorite beauty tool. If you're a hardcore gel potter, then this post isn't for you (unless you can be persuaded to switch it up). I want to share with you my very favorite liner pen. Here it is!

It's by Lorac and comes in three colors - black, charcoal, and navy. The line pictured here doesn't even nearly do it justice. You can make it much thinner and the color is so much more concentrated than that. What's so special about this fabulous pen is that instead of a felt tip like a marker (think Stila's pen), it's got bristles like a paint brush. I also feel like it comes to a much sharper point than your average eye liner pen, and on top of that the bristles are somehow both more firm and more bendy than a marker tip pen. The only way you'll ever understand what I mean is to try it for yourself. I get the smoothest and most precise line with this pen, and I've never had it wear off throughout the day. It's absolutely phenomenal. It also lasts forever. I think I've been using this liner for around two years (maybe even a bit longer) and I'm still only on my second pen, though granted I don't use it every single day. The only drawback to this pen is that the liquid dries a little shinier than I'd like, but it's really not too noticeable. On the days I really want to take my time and put on some flawless makeup I dab a little bit of matte black eye shadow on the top of my liner to take away any shine. All in all, I really couldn't expect too much more out of an eye liner. It earns a big, fat A+ in my book.
Monday, May 12, 2014
Let's talk about Bareskin!

Let's talk about Bareskin!
For those of you who don't know, it's the new liquid foundation put out by bareMinerals. The brush sitting next to the bottle is new as well. The little ditch is a reservoir for the foundation. You're supposed to put a few drops of the foundation into the reservoir then apply it by swirling it onto your face.
I work at Ulta so I'm lucky enough to get to play with all of the new products. I haven't had the chance to apply it to my or a customer's face yet, but I did put it on the back of my hand to check it out. I have to be honest, I am not a fan. It immediately settled into all of the little lines and creases into the back of my hand. For a comparison, I put my favorite foundation, Urban Decay's Naked Skin, on the back of my other hand and it didn't settle into anything.
As far as the brush goes, I thought it was just fine. I think the reservoir is strange and unnecessary, but I don't think it really takes anything away from the brush either. I would like to see how it wears and tears as most of the bareMinerals brushes don't last very long (i.e. the bristles fall out). But as far as a liquid foundation brush goes, I am obsessed with Urban Decay's Optical Blurring brush. Like I said, I haven't used bare's foundation on anyone's face yet so I can't truly speak for their brush, but UD's brush is fantastic. All of my coworkers and I own it and love it.
Now back to the foundation. I'm sure many of you lovely ladies are cult followers of bare, and it's great that you've found a brand that you love! But I'd just like to advise you to be careful. I have helped countless women in Ulta who were stuck on bareMinerals. I put a different foundation on them and they liked it so much more than what they were using by bare. Try to be open minded about other brands! There are other great things out there that you may never find because you're too stuck on one brand. And that's the great thing about Ulta - you can go in and try out just about anything you'd like. So go in and play around a little before you make any decisions (:
Thursday, July 4, 2013
The Best Foundation for Oily Skin
Hey all you beautiful, oily-skinned ladies! If you haven't already
discovered it, I'm here to tell you about a miracle liquid foundation
for you - Tarte's Amazonian Clay foundation. Here it is:

I have really oily skin, and I used to think I couldn't wear liquid foundation because of it. Powder just wasn't doing it for me; I wanted something with a little bit more coverage than that. When I started working at Ulta, one of my coworkers suggested this to me, and it is fantastic. It claims to be medium to full coverage, but I think you can get a sheer coverage out of it too if you put it on thinly enough or mix it with a bit of your face moisturizer. It's also buildable, so you really can get a full coverage out of it too.
I think it goes on great and doesn't make my skin any oilier than it already is. Personally I top it off with Matte Maker by Laura Geller to keep away the shine. It's a compact translucent powder to finish everything off (I also use powder foundation over my Tarte foundation for a little extra coverage).
If you want to know everything I wear to combat my oily skin, let me know! I've been trying to control it for years, so I have lots of tips and tricks that I've fine-tuned!
Sunday, June 23, 2013
Coconut Oil
Coconut oil. I'm sure you've heard a lot about it, because I know I have. I haven't used up until now though. I just picked up a jar for nine dollars the other day. This is what I got.
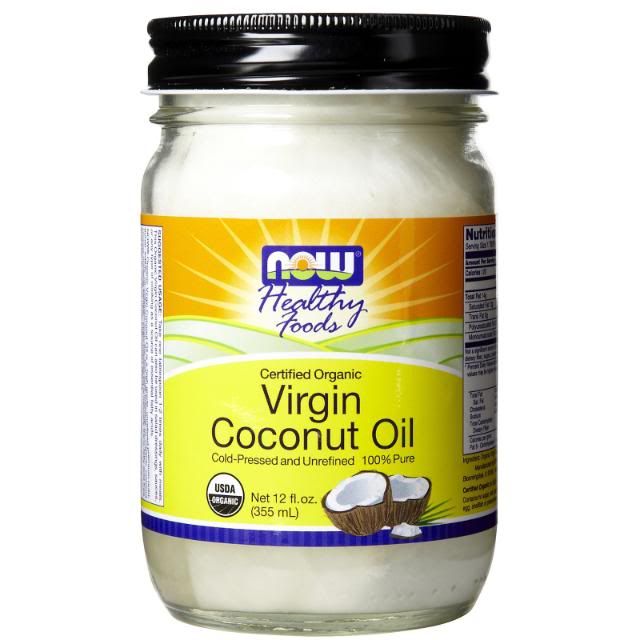
Now you can use coconut oil for cooking, but I bought it for my hair. The first time I used it, I slathered all over my hair (roots to tips) about a half hour to an hour before I took a shower. It took a little work to get it all out (I shampooed two or three times before it came out - I use the hydrating Moroccan Oil shampoo now), but it was absolutely worth it. My hair felt like butter after it dried. The stuff is amazing. You can use it as a lotion too. Also, it works great for lips as well (the kicker - it tastes great, and it's supposed to be pretty healthy for you too). I also use it as a leave-in treatment for my ends between washes. I wash my hair once every two, maybe three days, and if I notice that it feels a little dry between washes, I'll rub a bit of it onto the ends. Don't put too much on though; it's very oily. I also try and put it on a little thicker before every shower as well, though I don't think your hair always needs it from root to tip.
It's great stuff, and I definitely recommend it to anyone who feels like their hair needs a little extra work. It's cheap, and it's natural. I love it!
Monday, August 13, 2012
How to Take the Best Shower
I was showering yesterday and realized that I have a very specific routine when I shower for very specific reasons, so I figured I would share.

First of all, it's best to shampoo and condition your before you use body wash. This helps reduce bacne because then greasy conditioner isn't the last thing to touch your body before you step out of the shower.
Every time I shower, instead of just washing my face, I exfoliate it with a scrub to get rid of dead skin and make it as smooth as possible. Personally, I use Clean & Clear scrubs. They seem to work the best for me.
Now, most women know this already, but I'm here to tell you again. When you shampoo, only shampoo your scalp. Your hair doesn't get greasy except for the roots, so you don't need to dehydrate the rest of it! If there's any sort of product in your hair, it will get washed out when you rinse out your shampoo. When you condition, only condition the tail of your would-be-ponytail. If you use conditioner on your scalp, it will only make it greasy. Also, if you don't have a deep conditioner and would like a little more moisture, just leave your regular conditioner in for a few minutes (about three works). The heat in the shower really helps set it in.
As far as shaving goes, don't do it first! Soaking a bit in the shower helps you get a better shave. Don't wait too long though, any more than about ten minutes will cause your skin to swell. This won't allow you to get a close shave. Also, light exfoliating on the areas you shave is beneficial. Areas like your underarms and bikini line are more prone to ingrown hairs. Using something like a washcloth or loofah help to get rid of the dead skin that causes this. Also, if you get razor burn on your bikini line, use cream (such as Bikini Zone) specifically for razor burn on your bikini line or Neosporin to calm it.
One last tip. Make sure when you're using body wash not to get it in your hair. This sucks all of the moisture out of it.
Sunday, August 5, 2012
Lip Tricks
Want lips as kissable as these?

Here are the best tips and tricks I know!
I think this is the most important thing you can do for your lips: drink water! No one wants to kiss dry, cracked lips. Women should generally drink about 60 ounces of water a day, but this is different for everyone.
Now, if you do have dead skin on your lips, the best thing to do is exfoliate. Yes, you can buy lip exfoliaters. You can also use things from home to exfoliate. I've heard people use their vibrating tooth brushes every time they brush their teeth. Some people just use a warm, damp wash cloth and rub it over their lips. I like to use a heavy dose of chap stick and a disposable mascara wand to wipe off the dead skin. Some women keep the wands from old mascaras to use for this sort of thing. Just make sure not to rub to the point of pain!
If you wear any sort of lip color, the best thing to do is dab a little bit of a shimmer on the center of your bottom lip. This has the same effect as highlighting on your face; it highlights your lips and makes them appear more full.
For those of you who use lip liner - draw only on your lips! I've seen women try to line outside the lines of their lips in order to make them appear larger. While this thought is appealing, it's not realistic. It is noticeable.
Subscribe to:
Posts (Atom)